

My name is Elisabeth Viguie Culshaw, I am a natural dyer and a dye plant grower (small scale) from Glasgow (Scotland).
I took to grow Japanese Indigo (Persicaria Tinctoria) and Woad (Isatis Tinctoria) a number of years ago and last year in the grounds of the Glasgow Botanical garden. It is purely educational, I like to help people around me to make the connection between botanical and colour.
I am a gentle activist, I hate the idea of bombarding the simple person in the street with statistics on how many million tons of unwanted garments are produced every year I prefer to show them what else can be done. I like to share with all age groups and I have been engaging with schools the past few years. My thinking is if you can just educate at an early age you have won a battle. It would be my dream to learn later than some of the kids I ran sessions with have become a natural dyer themselves or are questioning the way things are done and thinking for themselves on how to do things better.
This year was a little challenged for me this year having caught a bad virus in Indonesia in the Spring I have been left with little energy to run many workshops over the summer, my focus has been on making sure the dye garden grew well and doing a lot of experiments solo.
Japanese Indigo grows well in Scotland, the climate is perfect but somehow this year we have had so little sun that the pigment has not built as much as the previous years… it is the same pigment though.. so great colour but not so concentrated.
Last season I spent a lot of time extracting pigment for paste or powder but this year I though I would push the fresh leaves dyeing techniques to see how far I could dye with it using a different range of fibre. I also wanted to make sure to use up everything single pigment I extracted by not only using the Indoxyl dye but also reducing what was left in the pot and … it worked.
So below are the experiments I ran and in the header is the colour range I obtained. It is mind blowing and I could do so much more but then the winter is now upon us soon and I will take a break…
1 – SALT RUBBING METHOD – TURQUOISE BLUE


With very many groups I used the Salt Rubbing method with a small piece of silk. This consist in crushing Indigo leaves with the help of salt to extract the Indoxyl and by rubbing the leaves and juice extracted the Indoxyl becomes Indican the Indigo precursor which turns into Indigo when oxygen kicks in. Just like which Indigo dyeing you can over dye with another load of leaves and get darker colours … the turquoise blue obtained will never get as dark as dyeing in a vat because of the quantity of pigment involved. When washed out the colour gradually turns from turquoise to bluer and gradually the chlorophyl present on the fabric will fade giving the piece a more blue.
All children I taught this technique enjoyed the fast technique and the immediate result they could obtain.
2 – ICED METHOD – TURQUOISE BLUE


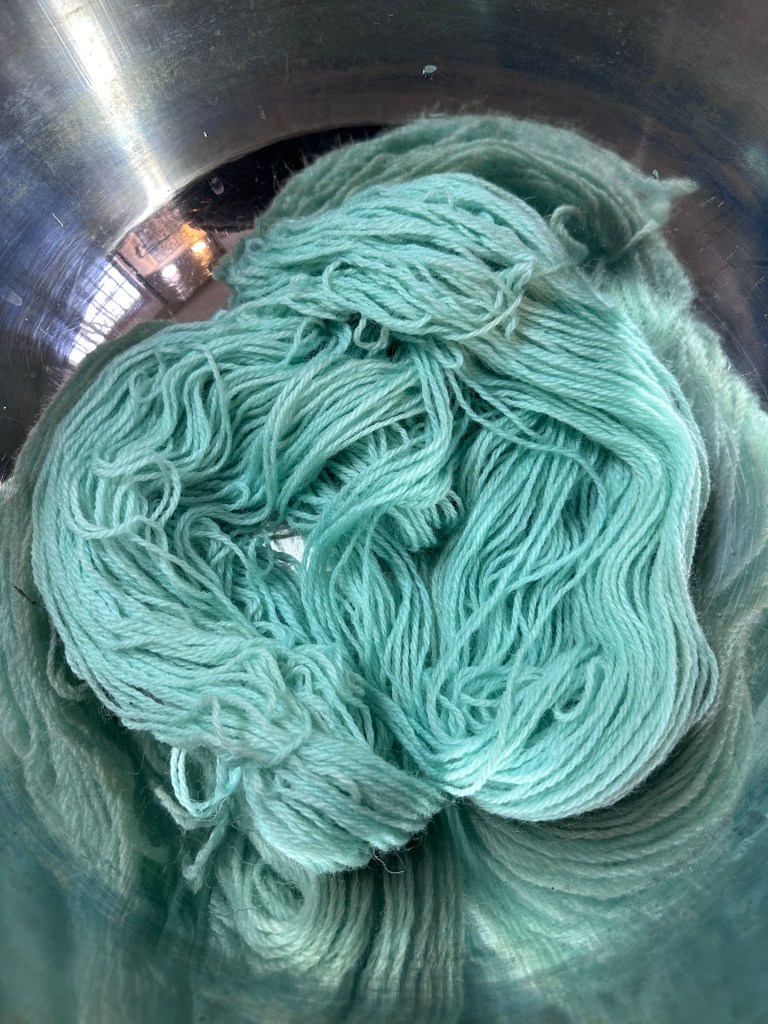

With some groups in the studio and very much on my own I performed a lot of iced method extraction. It needs access to water and electricity so it had to be done indoors but was a lot of fun and learning.
You only use leaves and some very cold water which will help the enzyme you need from the leaves to stay alive. I believe this is sometimes performed in Japan although I have not yet found evidence but I believe it was introduced by Rowland Ricket from the USA and I love working with it. I have seen many shares online of this method but very often by dyers who don’t fully understand the way Indigo works and omit the importance to work cold and fast. Very often there is a lot of pigment oxydised left in the water that is disgarded … but because I grow my small amoung of plants I am very determined to use up my pigment… see below what I have done to do so.
So peel off leaves from stem and blitz with cold water in some kind of smoothie (or Matcha tea like), you have to extract the leaf matter to use the green mix as a cold dye. It works perfectly with silk and wool. The dyed fabric comes out green but oxidises well into turquoise blue. You have to work fast but you can over dye several times for a great result. I tried with up to 6 dips with silk/cotton/wool/linen… the strongest was on chiffon silk.
I was quite disapointed to think that a great deal of pigment was left in the mix and decided to reduce it into a vat see below.
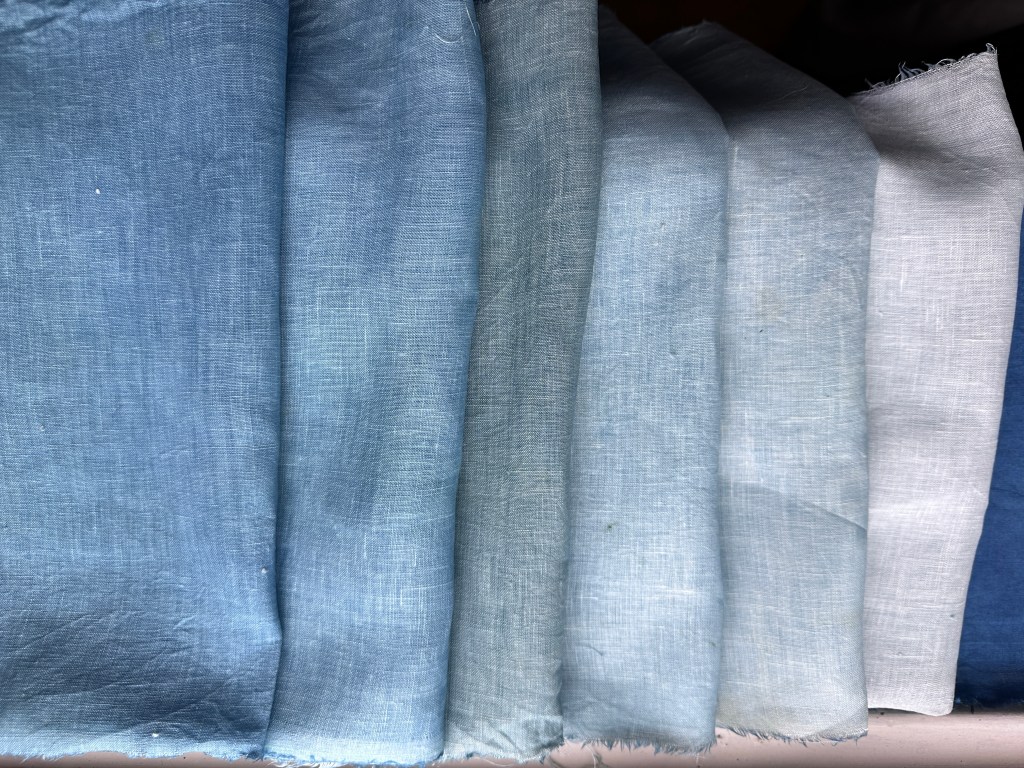
3 – REDUCED VAT USING HYDROSULPHATE – BLUE NOT SO TURQUOISE


I decided to run this experiment on my own several times to see what happened…
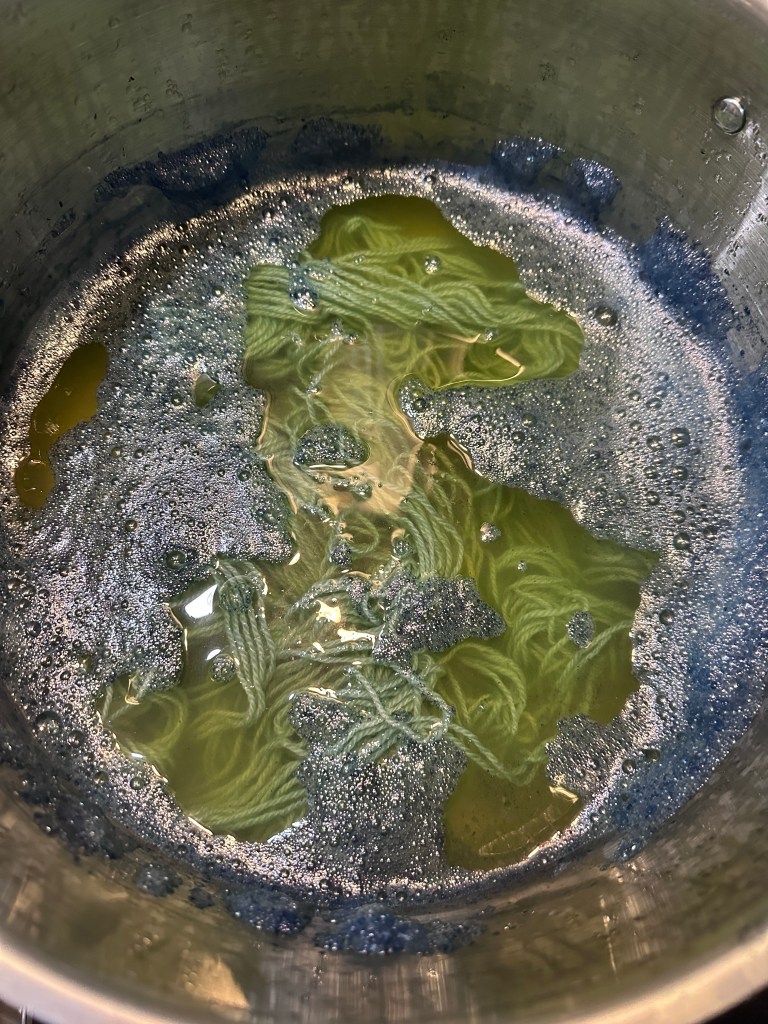
I brought up to a higher temperature the dye bath and used the Thiox vat recipe for it, I had see this process at the AGWSD a few years ago. I choose Thiox in opposition to a natural recipe because Thiox is a fast and strong reducing agent and only a little pigment was available. Surprisingly it worked very well every time I used it. It produced a very weird looking vat (very green) as it is leaf matter in that dye bath.
The vat took only a short moment to work and the help of a blanket surrounding the dye pot helped a lot. It looked well reduced but so green 🙂 I was surprised it worked but I obtained some great blues from it and it gave on and on and on in many dips.
With this vat I was able to create blue dyed cellulose material which I could not make work with the iced extraction… yet it was the same dye pot… How interesting that this pigment needed a reducing agent for it.
Health and safety… When using a Thiox Vat make sure you are working outdoors on in a ventilated environment and don’t work bare hands. It is very alkaline and will damage your skin.
I dyed wool, silk of several kind and linen, cotton snippets a great number of them This vat could dye for a couple of days . I am so happy about the range of blue (not so turquoise) heating the dye pot seems to have killed any yellow left in that dye extraction.
I will for sure repeat this next season this time with more natural vats to compare.
4 – HOT EXTRACTION – PURPLE INDIRUBIN
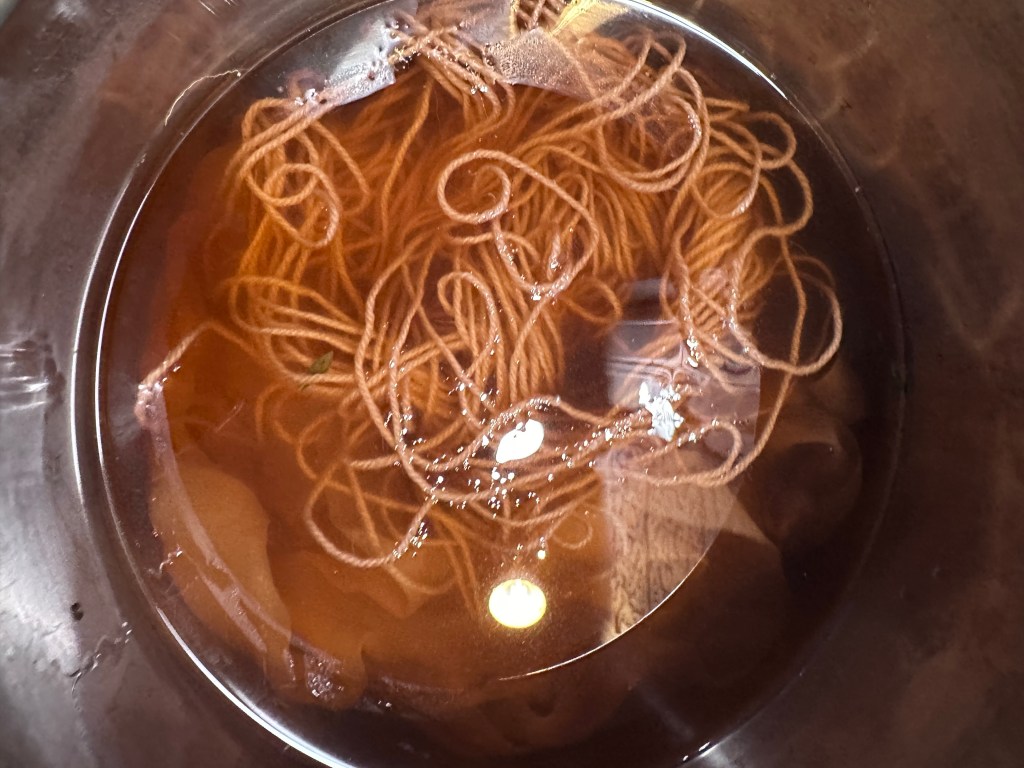

The poor weather was not very conducive of trying cold extraction for fear of looking colour so I had a few tries of making hot extraction. This involves using leaves only starting them into hot water. There are a few different methods and I tried two. I found the low heat overnight worked better for me that the heavy heat which works well with Woad leaves. Indigo leaves are much softer and when heated to much they then start fermenting… I had the task of finding a way to keep the dye bath to a “ouch” temperature and that was a mix of bain marie and warm blankets as I did not want to use electricity for such a long time.
I describe this method in details in my online method shared with my “Home growing participants” and if you would like to be part of this you could join in 2024.
I had read about Indirubin from John Marshall and more recently by Luisa Ulrike who runs an Indigo dye garden in London but had not quite worked out the mechanism.
After this several tests I now can work out what happens in the process, by extracting some of this extraction liquid and dyeing directly with it without modifying it you can secure wonderful shades of pink to purple on silk and wool. As I have little pigment in my leaves I failed to get a bigger variety of shades but my guess is that with a stronger extraction I would get a variety of shades. That is something I will experiment more with next season.
I found it very interesting that with the same extraction I could use part of it for Indirubin pink to purple and part of it for blue.
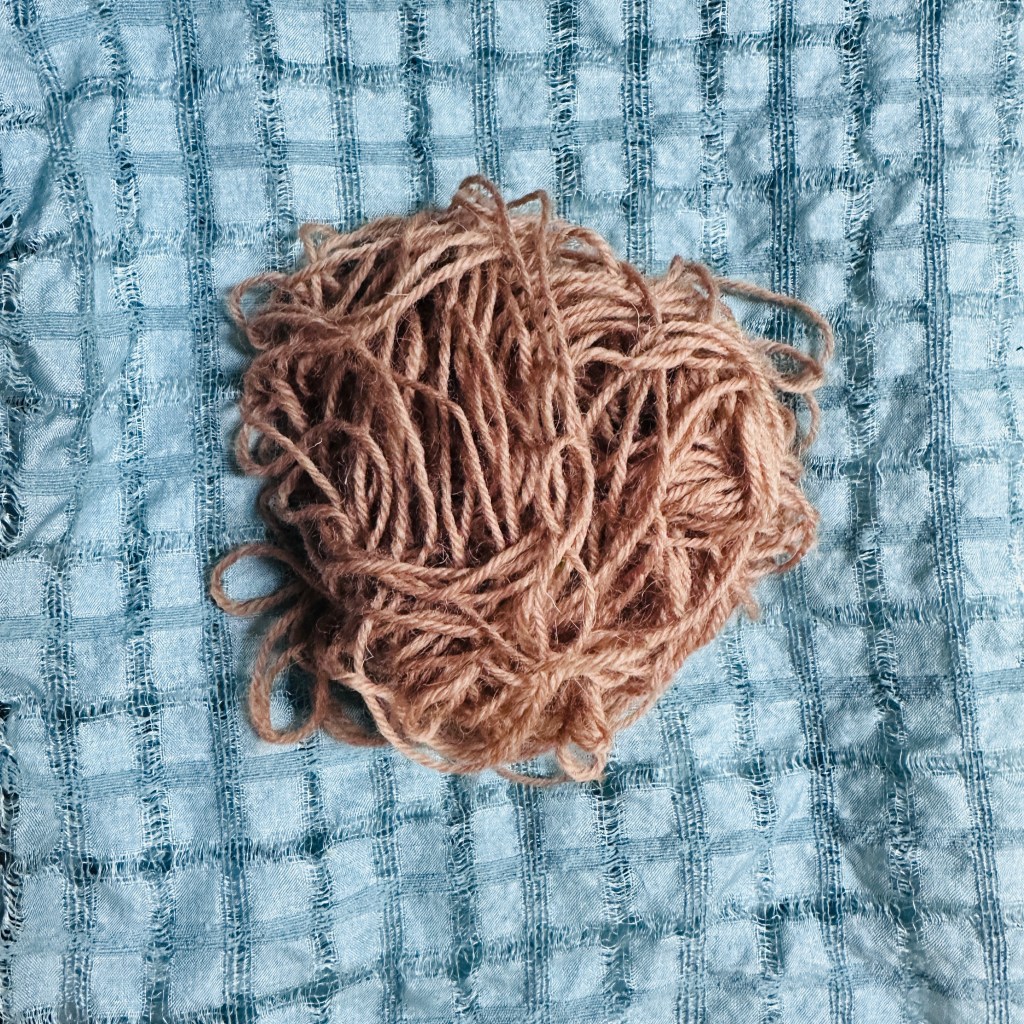
5 – HOT EXTRACTION AND VATS – BLUE, GREEN, GREY, BROWN
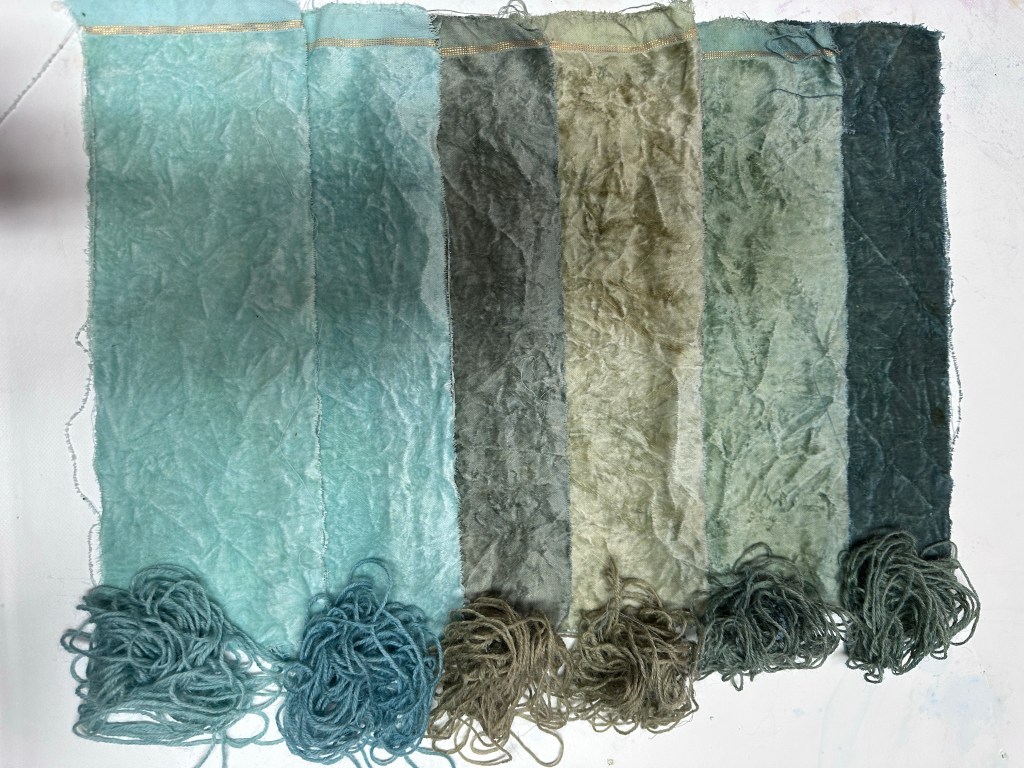

A lot of my time was taken making vats from the hot extraction, small vats of just a few litres using natural methods such as ferrous vat and fructose vat but also thiox.
My pigment is very precious as only growing it in small quantity and I always want to make sure that i dont waste any as it will take me another year to get to the next load.
I made Thiox vats… many have grown into disliking Thiox as a process but when working with fresh leaves extractions in small quantities it is a good way to see how far your pigment works. You just have to be mindful that you need a little ventilation when you are working with it.
The Thiox vat from fresh extraction work really well and give great blue, just like with a powder pigment vat you can over dye many times and it is a good way to dye cellulose. Cellulose is always tricky when working with with fresh leaves.
I was surprised to see i could get good blues and over dye over a period of several dyes on wool, silk, linen and cotton. If pushing this technique too far I would eventually switch the blue for a purple and very pretty. At this stage I can not explain why but I will research this.
I split some extraction to make a ferrous and a fructose vats. This is a tricky one as many use Michel Garcia recipes 123 for making natural vats and off course as you don’t know how much pigment you have in the extraction it is most difficult to calculate. I have recently seen so many questions going past about failed natural vats because of this… My answer to those who got stuck is that just as for cooking from scratch you have to detach yourself from the recipe and understanding what happens in the dye pot. If you understand that the whole reduction process happens because your dye bath is at the right alkaline level then you can look back and calculate the reducing agent quantity.
From my ferrous vat I managed some blues but also some really nice brown green and beige on cellulose fibre as well as silk (I used a lovely silk velvet).
From my fructose vat I managed some softer blues than with the Thiox for the same quantity. It was a very interesting process but really not the best use of my pigment.
SO WHAT NOW:
I believe learning from a dye plant can be a long process if you use quite an empiric method and I am looking forward to experiment further with this next summer.
I now have the large task of labelling and documenting properly the samples I made and these methods fully detailed will be added on my online “Home growing” class for 2024. If you are interested in growing with me Japanese Indigo and Woad in small quantity for learning about it… please join my class in the spring.
If you want details about this email me on bettysbeautifullife@gmail.com
Loads of blue love to you.
Betty x
Discover more from THE LANSDOWNE HOUSE
Subscribe to get the latest posts sent to your email.
